Adobe Premiere Pro Error Uploading to Youtube
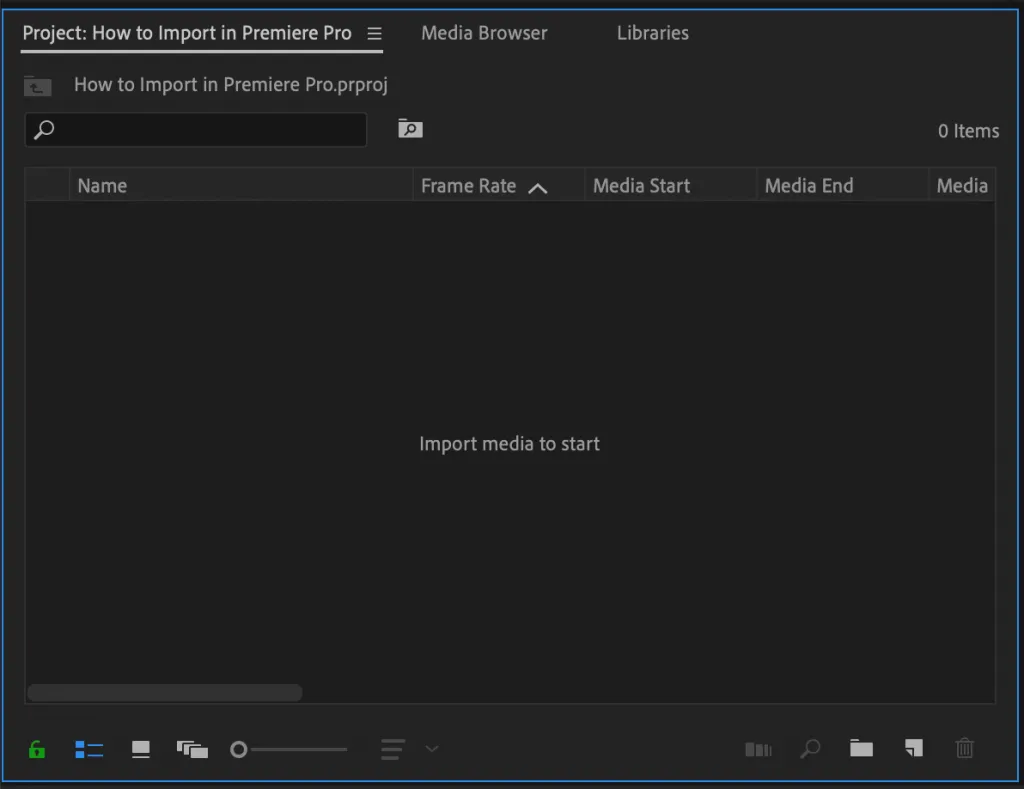
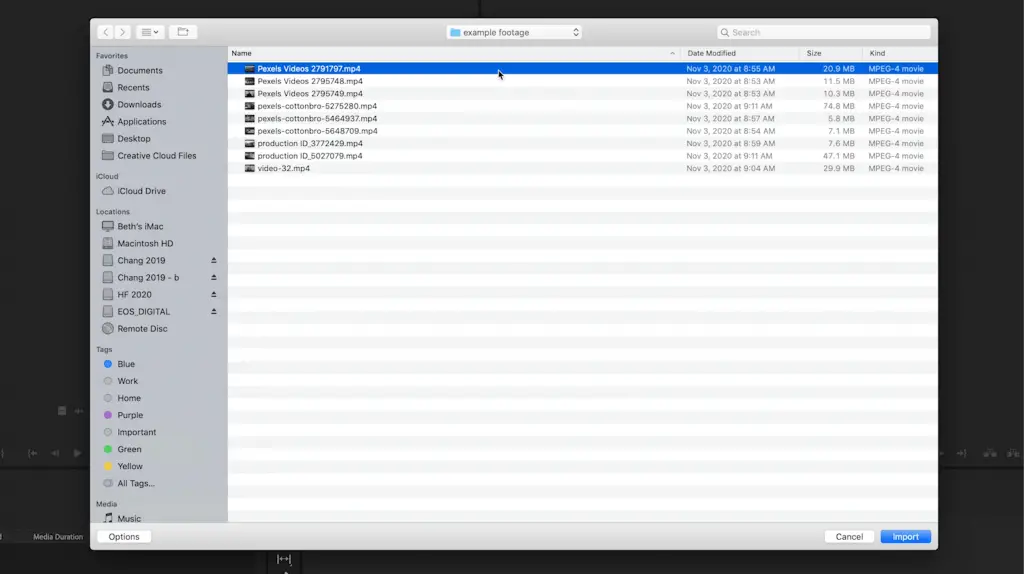
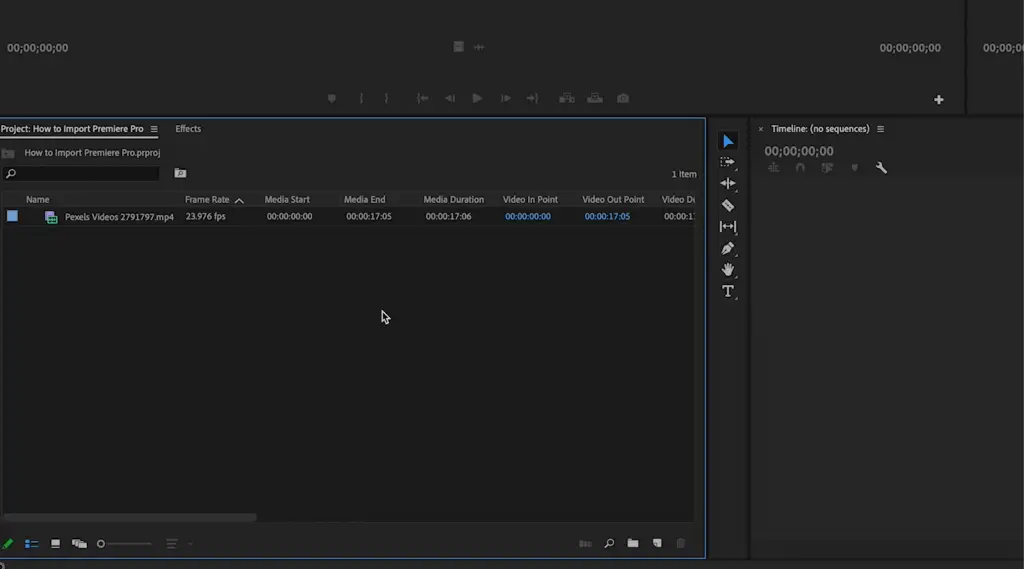
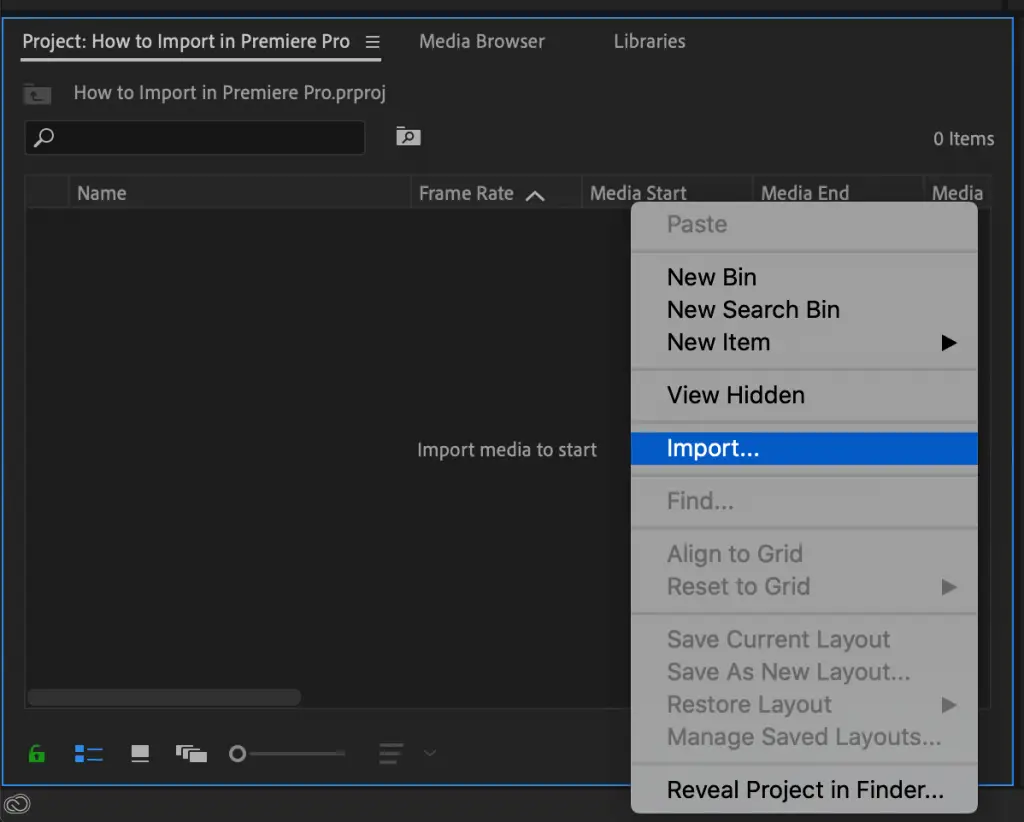
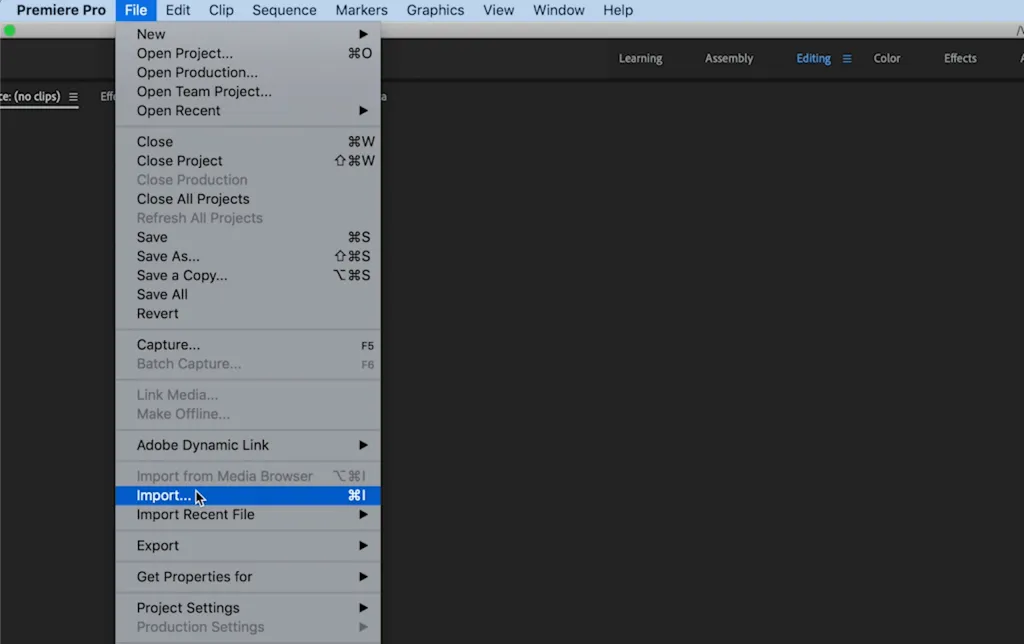
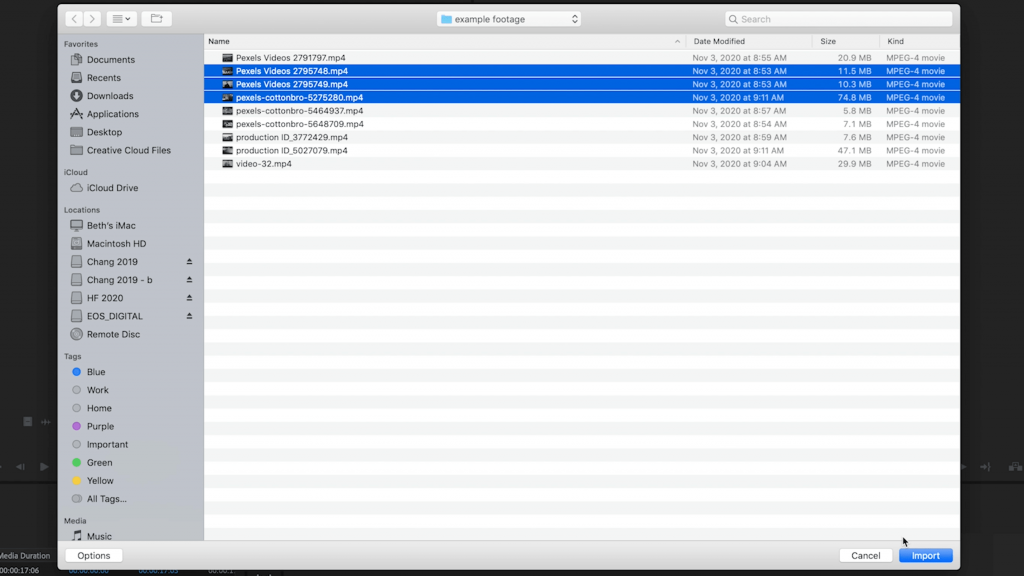
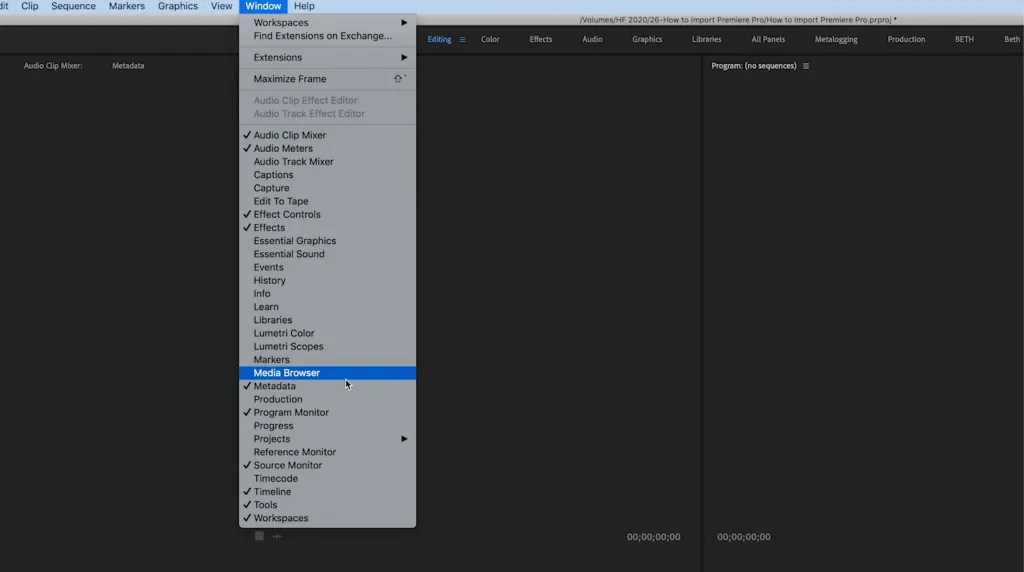
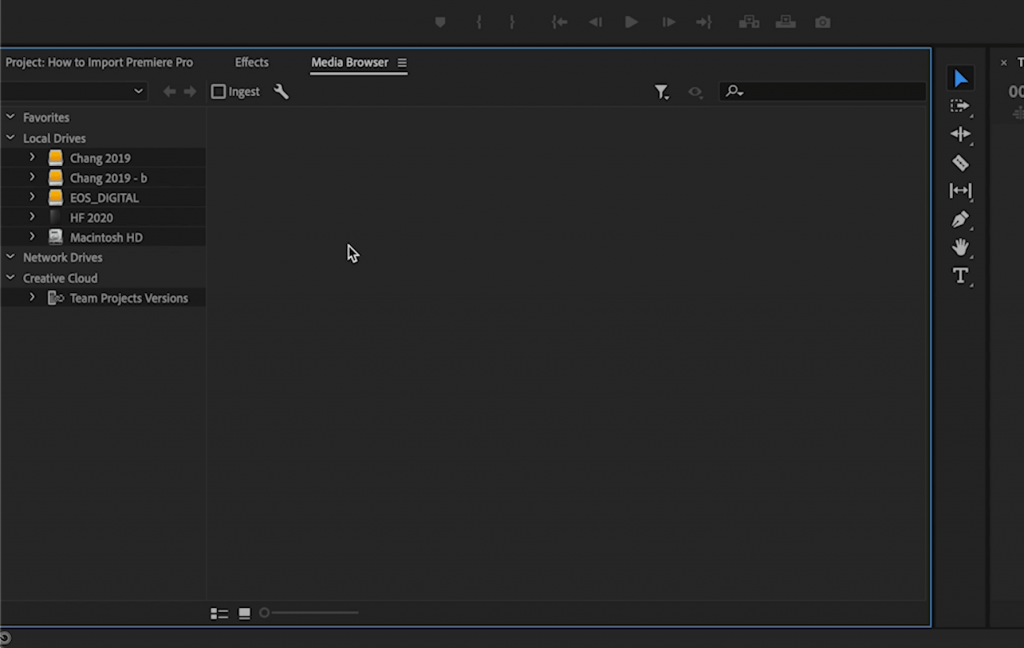
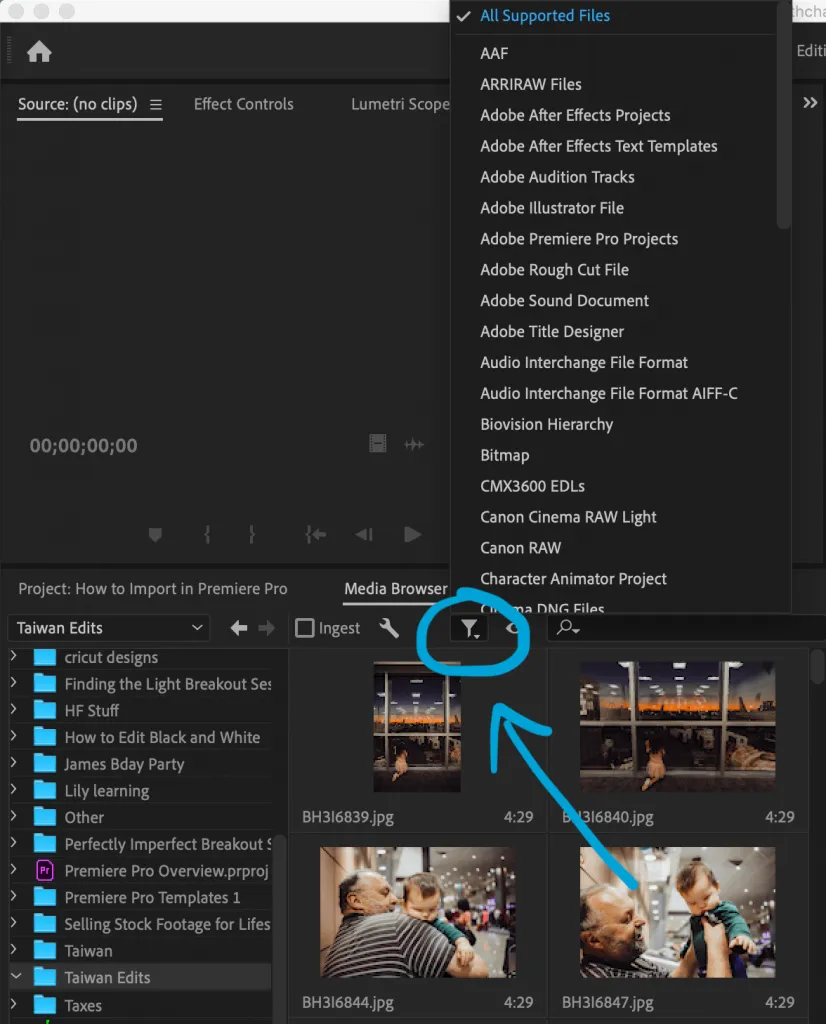
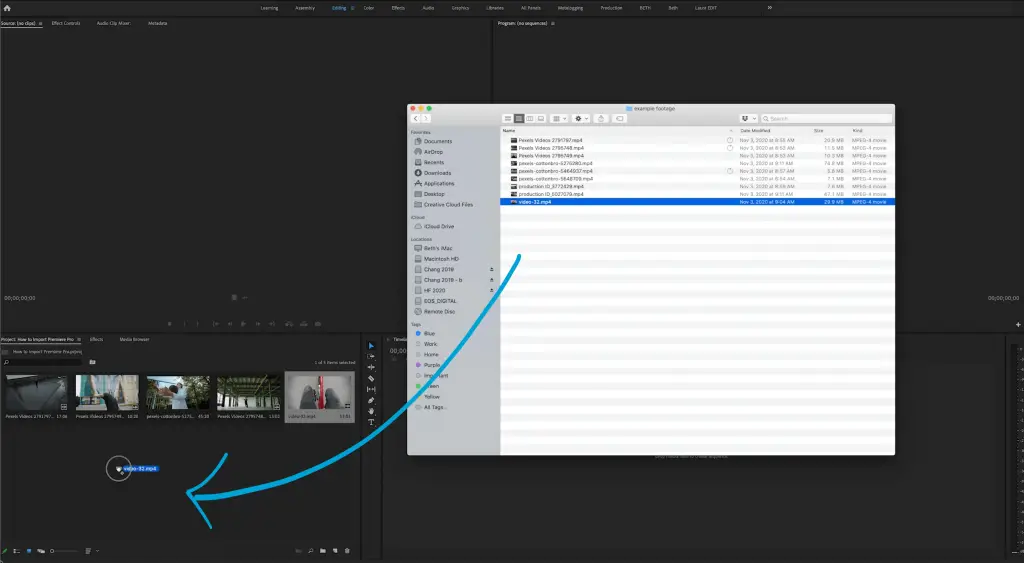
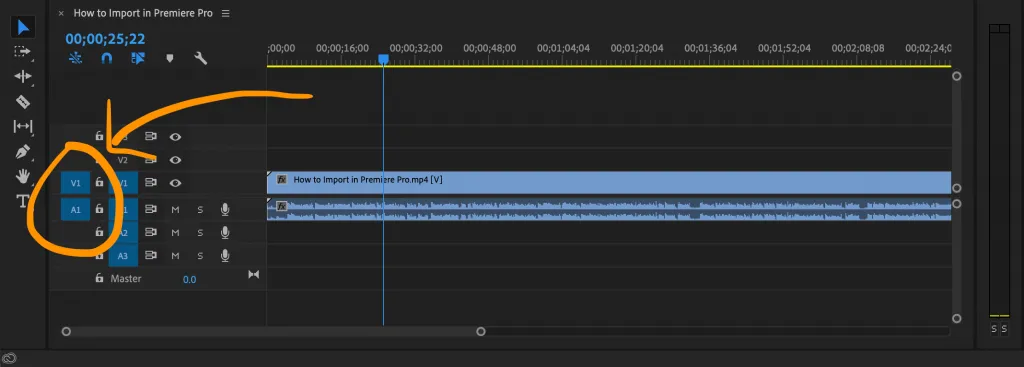
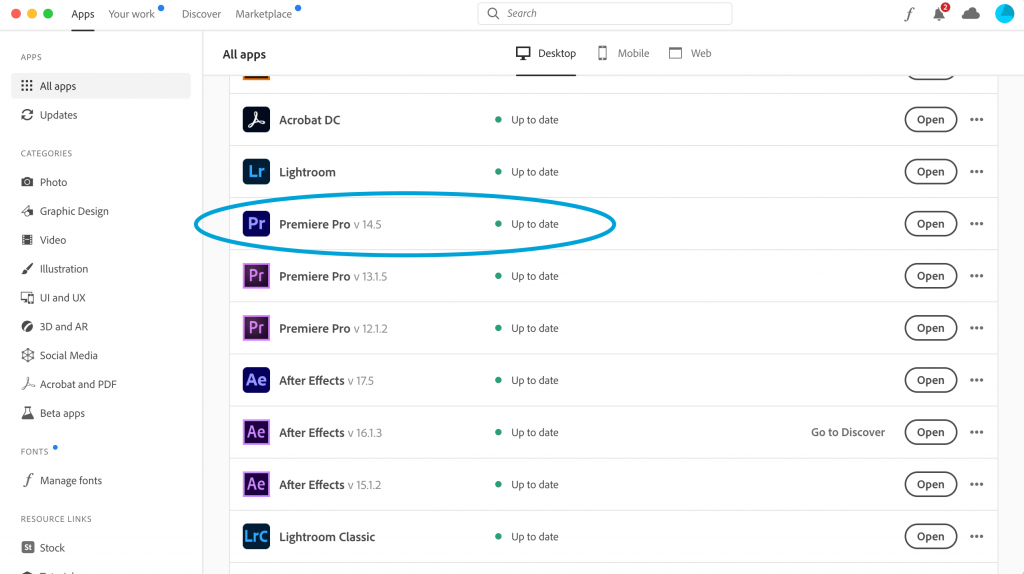
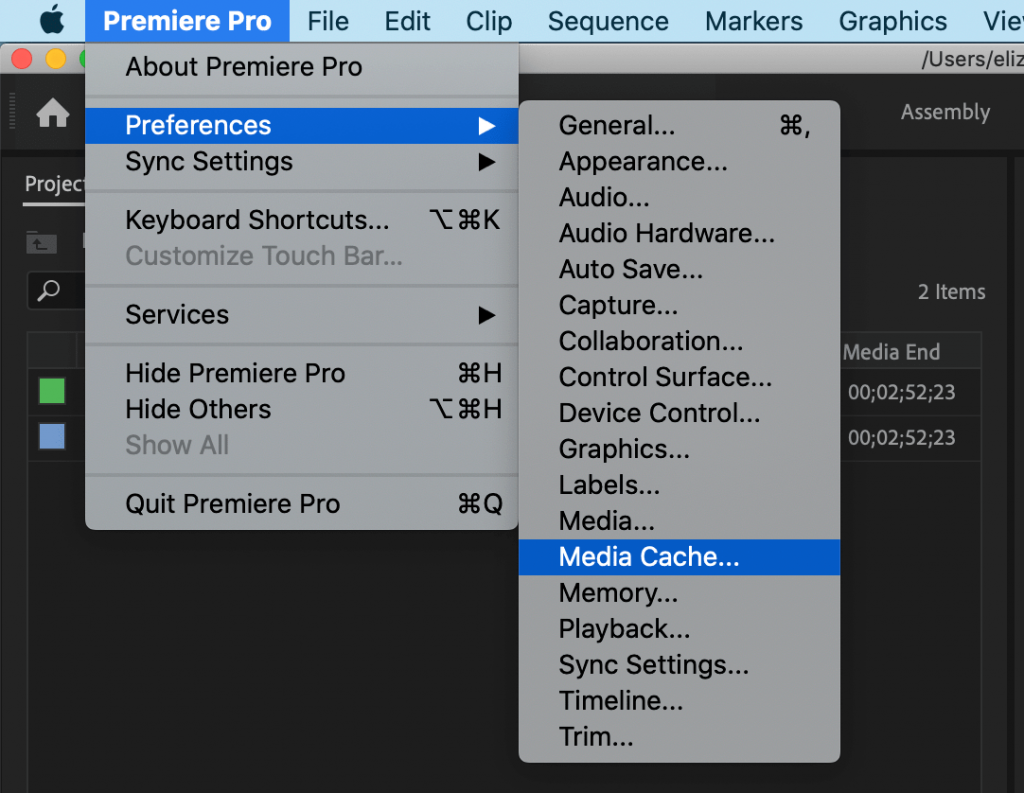
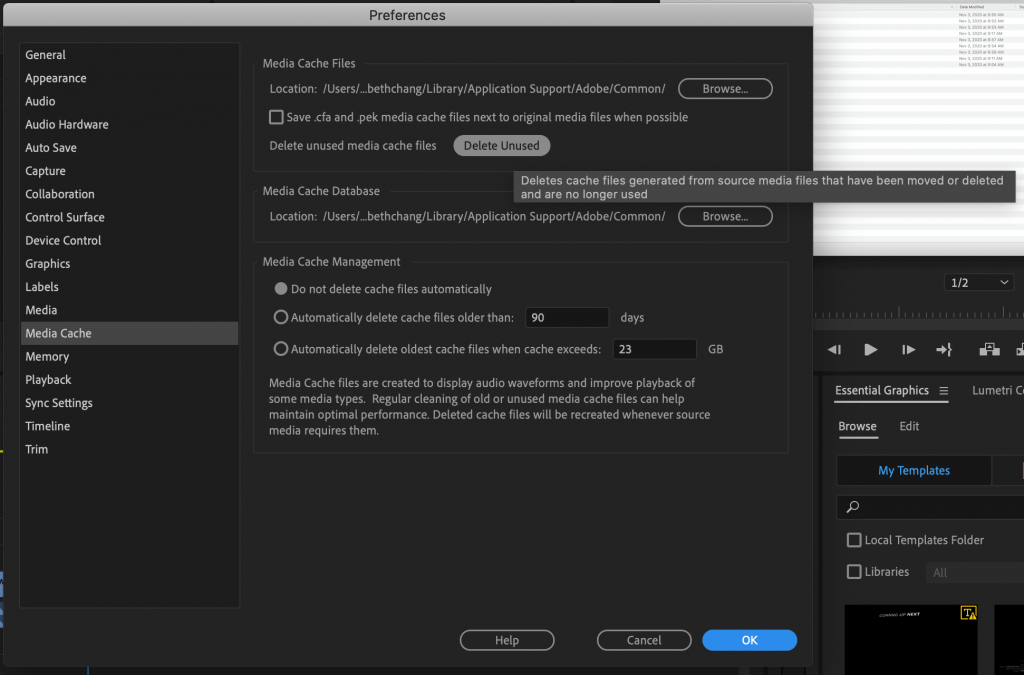
Hither are three quick and like shooting fish in a barrel means to import your footage and other media files into Premiere Pro. Each method has a different reason why you may choose to import in this manner. Allow'due south walk through each method and then you can decide what makes the nearly sense for your video project. You may besides be having problem importing certain types of files into Premiere Pro. If that's the case, scroll on downwardly to discover some common reasons for import failure in Premiere Pro. If you're new to Premiere Pro, exist sure to cheque out more beginner Premiere Pro tips & tutorials on the blog. Why Use This Method: It'south the quickest and easiest (imo). 1 | Once you've opened up Premiere Pro, navigate over to your Project Window. 2 | Simply double click anywhere in this box and a window will open up, assuasive you to find the footage or files y'all'd similar to import. 3 | Select one or multiple clips and hit 'import'. 4 | You tin besides right-click anywhere within your Projection Window and select 'Import' to open the aforementioned import menu. Why Utilise This Method: It's the easiest to think for beginners or if you get lost. 1 | Navigate to the top menu bar of Premiere and select 'File' 2 | Select 'Import' and a browser window will open upward allowing you to cull which files you'd like to import into Premiere Pro. three | Select the files you'd like to import and click 'Import' to add them to your project. Why to Use This Method: You can leave information technology open up while standing to work on your project for continued admission. It also works best for more than complicated file imports from sure video codecs (Cerise camera footage, for instance). Annotation: If your footage is buried in a confusing list of folders with unrecognizable file types, yous probable need to use media browser. This will ensure that the correct file types are imported, along with the right meta data attached to each file. The Media Browser gives you quick access to all your assets while y'all edit making information technology easy to browse to files. Unlike the Import dialog box, the Media Browser can be left open up and docked, like whatsoever other panel. 1 | Navigate to the top menu and select 'Window > Media Browser' two | The Media Browser panel opens. On the left, in that location is a list of folders. On the right, the contents are displayed. Yous can toggle between listing view and thumbnail view. In the listing of hard drives and folders in the Media Browser, click the triangles next to folder names to open them. 3 | To view only files of certain types, click theFiles types displayed icon, and select a file blazon. To select an extra type, open the menu again and make another pick. Repeat until all desired types accept been selected. 4 | Select one or more than files from the list of files. v | To preview the clip in the Media Browser, movement the cursor over the thumbnail. Alternatively, double click the prune to open it in theSource Monitor. You can likewise right-click the file in the Media Browser and selectOpen In Source Monitor. half dozen | To import your called clips, right-click the file in the Media Browser and selectImport. You tin drag the file from the Media Browser into the Project panel, or elevate the file from the Media Browser into a Timeline. 7 | The Media Browser will now import the file into the Project panel. Why Use This Method: Personal preference or if y'all want to directly import from another location on your figurer. 1 | Navigate to the files y'all wish to import inside a finder window on your computer. two | Select the files you want to import and drag them into your project panel in Premiere Pro. Notation: you'll see a little green plus icon if the file is compatible in Premiere Pro. That covers the three primary ways to import your footage and other files into Premiere Pro. Merely what if you've encountered an issue when trying to import your files? Hither are some common problems you lot may encounter while importing files into Premiere Pro and how to fix them. Hither are all of the many types of files that can be hands imported into Premiere Pro: As long every bit your withal image or graphic file falls nether one of these types of extensions, you lot can only import information technology in whatsoever of the iii easy ways to import we covered at the offset of this article. Hither are some more detailed notes to keep in mind for all-time practices when importing still photos into Premiere Pro. The maximum frame size that tin can be imported for still images and movies is 256 megapixels, with a maximum dimension of 32,768 pixels in either direction. Before you import a all the same image into Premiere Pro, you should consider doing the following in society to reduce rendering time within Premiere Pro. You lot tin import files from Adobe Photoshop 3.0 or later, or from Adobe Illustrator. You can control how layered files are imported. Empty (transparent) areas of nonflattened files are transparent when imported into Premiere Pro, because the transparency is stored as an alpha channel. This lets you import graphics and superimpose them over clips in other tracks with no extra effort. You tin import layered Photoshop files either with selected layers imported equally individual clips into a bin, with selected layers imported as individual clips into a bin and sequence, or with selected layers merged into a single video clip. Also, you can import Photoshop files that contain video or animations if they are saved from Photoshop in timeline animation mode. Y'all can import an Adobe Illustrator withal-image file directly into a Premiere Pro project. Premiere Pro converts path-based Illustrator art into the pixel-based prototype format used past Premiere Pro, a process known asrasterization. Premiere Pro automaticallyanti-aliases, or smooths, edges of the Illustrator fine art. Premiere Pro also converts all empty areas into an alpha channel, so that empty areas become transparent. Even though the layers in Illustrator are merged in Premiere Pro you can edit the layers by selecting the clip and choosing Edit > Edit Original. There are a scattering of unique video codecs that Premiere Pro simply won't recognize. You may see the following mistake bulletin: Codec missing or unavailable. If this happens, you simply need to convert your incompatible files into files that Premiere Pro understands. For a listing of compatible video codec formats in Premiere Pro, check out this list on Premiere Pro'due south site. Information technology'due south lengthy and constantly being updated, so I wanted to link you directly to the source. Here are two complimentary programs that work on both PCs and MACs to convert just about every type of file format to a format that's compatible in Premiere Pro: VLC and HandBrake. These are both complimentary programs that will convert your files into a more compatible format that Premiere Pro will recognize. 1 | Download your font ii | Double click on the .nix file for your download 3 | If your file is a .otf or a .ttf file, just double click and your computer should automatically load the font window. 4 | Click 'install'. 5 | Restart Premiere Pro if you already have it open. six | Your newly downloaded font should at present appear in Premiere Pro when using the Essential Graphics console. You can import Premiere Pro projects into your projection console in exactly the same way as other footage. If y'all'd like a more than thorough explanation of how to download, install, and import MOGRT files into Premiere Pro, cheque out this in-depth tutorial I made all about it. Typically YouTube videos are downloaded in the MKV file format. These types of files are not directly recognizable in Premiere Pro, then yous'll need to covert them to a file format that Premiere Pro recognizes. Using VLC and HandBrake, catechumen your mkv file into an .mp4 file. Here are a few mutual issues that may arise when trying to import your media files into Premiere Pro and how to ready them. Before anything else, make certain that both your video and audio source patching is enabled. This is a common result if yous find that only the video or audio portion of your clip is importing. Source patching simply tells Premiere Pro that you'd similar to edit both the video and sound portion of your clip in the timeline. 1 | With your clip selected in the Project Panel, you should see V1 and A1 highlighted in bluish on the left most side of the timeline. ii | If you lot only see 1 or the other, simply click within that area to turn source-patching on. If you are getting the following error: 'File Import Failure. The importer reported a generic mistake.' So read on. At that place are a handful of reasons that you may exist getting this error, but the well-nigh mutual reason why you may receive this mistake is because of a corrupt file or file type. Hither'southward how we can fix the File Import Failure Mistake in Premiere Pro. 1 | Make sure that you've updated your current version of Premiere Pro to the latest version. ii | Restart both your computer arrangement as well as relaunch Premiere Pro. three | Endeavor to import your files in one case again. 4 | If you lot notwithstanding receive the aforementioned message, more than likely you need to catechumen these files. v | Using VLC or HandBrake (both free), endeavour converting one file to either a .mp4 or .mov file to see if this solves the outcome. vi | If that solves the issue, then y'all tin choose a unlike type of file blazon to convert to if you wish. 7 | If you lot are STILL getting the error message, it'southward time to clear your enshroud files. Navigate to 'Preferences' -> 'Media Cache' Select the button that says 'Delete Unused' and hitting 'OK'. If none of those solutions work, and then the trouble could be on the software stop, meaning you'll probable need to contact Adobe Customer Support for more specific aid. Method 1: The easiest ready for this problem is to but rename the file extension on your .mkv file. Method 2: Catechumen the .mkv file into a more compatible format. Using VLC and HandBrake, convert your mkv file into an .mp4 file. When y'all import your video file and drag it into your timeline, simply the audio portion of your prune appears. Make sure sourcepatching is turned on for both video and audio tracks on your timeline (come across higher up for more detail). This problem is caused considering just the audio codec is being recognized and not the video. Here'due south how to fix it. Reimport your newly converted file into Premiere Pro and that should fix the trouble. Note: if you have multiple files in need of converting, you tin complete the same process by dragging them all into the VLC window at the same time. Believe me, I know just how frustrating it can be to run into a technical problem like this in Premiere Pro. If you accept an consequence that isn't easily solved by any of these solutions, go out a comment below and permit us know exactly what the problem is and how you lot've tried to fix it. I'd be happy to help you lot explore more solutions. Thanks for reading! -Beth Three Like shooting fish in a barrel Ways to Import Videos Into Premiere Pro
Method 1: Double Click in the Project Window
Method ii: Utilize the Drop Down Import from the File Tab
Method 3: Open Media Browser Inside of Premiere Pro

Method 4: Drag and Drop Files from the Finder Window
How to Import Other Types of Files Into Premiere Pro
Importing Photos (JPEG, PNG, TIFF, PSD and more)
AI, EPS Adobe Illustrator BMP, DIB, RLE Bitmap DPX Cineon/DPX EPS Adobe Illustrator GIF Graphics Interchange Format ICO Icon File (Windows only) JPEG JPE, JPG, JFIF PNG Portable Network Graphics PSD Photoshop PTL, PRTL Adobe Premiere title TGA, ICB, VDA, VST Targa TIFF Tagged Interchange Format Best Practices for Importing Nonetheless Photos in Premiere Pro
Preparing however images earlier importing
Importing Photoshop and Illustrator files
Importing Illustrator images
Importing Unique Video Codecs
How to Catechumen Files in VLC Media Encoder:
How to Import Fonts Into Premiere Pro
How to Import Templates (MOGRT) and Premiere Pro Projects Into Premiere Pro
How to Import Youtube Videos Into Premiere Pro
Troubleshooting: Premiere Pro Import Not Working
Make Sure Sourcepatching is Turned On
File Import Failure Fault in Premiere Pro
How to Import MKV Files (mkv Not Supported Fix)
Sound Imports To Premiere Pro But No Video
Terminal Thoughts
Source: https://www.handcraftfilms.com/blog/import-videos-premiere-pro/
0 Response to "Adobe Premiere Pro Error Uploading to Youtube"
Post a Comment